Phone: +86-137 5102 2384
Phone: +86-137 5102 2384
Sep. 23, 2026
Share:
To prepare a PCB design for automated assembly, build it around design for manufacturability (DFM), reliable pick-and-place data, and controlled solder paste printing from the beginning. A practical PCB design for SMT assembly should include correct fiducial markers, verified component land patterns, and production-ready SPI inspection requirements. This guide explains how to prepare a PCB design for automated assembly, avoid common placement and soldering failures, and work efficiently with a one-stop PCB assembly service such as Benewave.
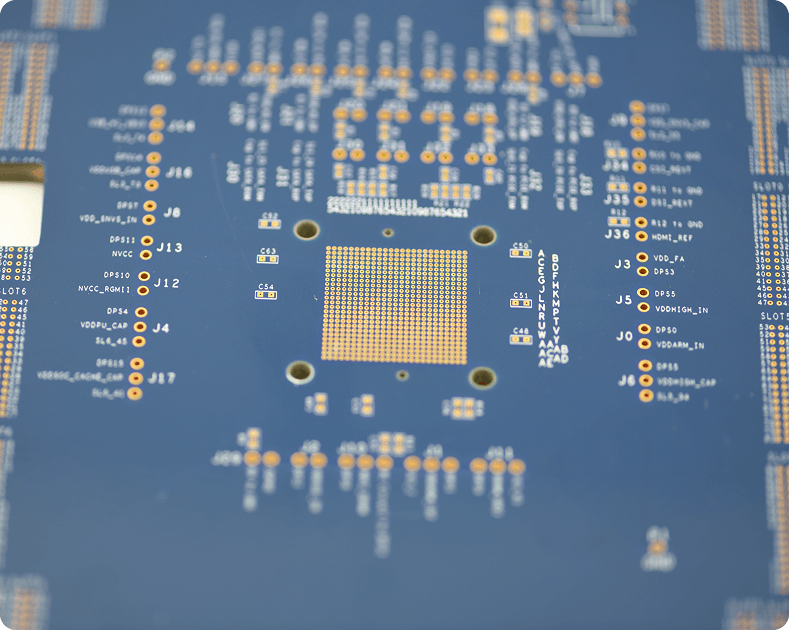
Many assembly problems are not caused by the SMT machine. They begin in the schematic, footprint library, CAD export, or component purchasing stage. A board may pass electrical simulation and still fail during manufacturing because the assembler cannot recognize a polarity mark, the nozzle cannot pick a component, or the stencil opening deposits too much solder.
Typical production problems include:
These failures create measurable costs. A missing polarity mark can cause manual inspection and rework. A poorly designed QFN thermal pad can produce solder voids or floating components. A wrong rotation value in the centroid file can result in an entire batch being placed incorrectly.
Before routing the board, define how it will be manufactured. Ask your assembler whether the project uses:
Lead-free SAC305 solder, for example, normally requires a peak reflow temperature of approximately 235–250°C, depending on the paste manufacturer’s profile. Components, connectors, labels, and batteries must be rated for the actual thermal process rather than an assumed temperature.
A complete manufacturing package reduces clarification emails and prevents mismatched files. Benewave or another one-stop PCB assembly provider will generally need the following information.
The BOM should contain the reference designator, quantity, value, package, manufacturer, manufacturer part number, and approved alternative. Avoid using only descriptions such as “10 kΩ resistor, 0603.” A specific manufacturer part number is needed because two components with the same nominal value may have different tolerances, power ratings, termination materials, or moisture sensitivity levels.
Use an electrical rule checker and a DFM checker before releasing the design. The following tools are useful:
A simple but effective practice is to print the PCB at 1:1 scale on paper. Place physical components over the printout to check connector spacing, polarity, mechanical interference, and accessibility. This does not replace 3D verification, but it can reveal a misplaced connector in less than ten minutes.
Download the current datasheet and recommended land pattern for every component that affects assembly risk. Confirm:
Do not rely solely on a generic library footprint. A 0.5 mm pitch QFP, for example, may require a different toe extension and heel geometry than another package with the same pin pitch. An incorrect footprint can create bridges, insufficient solder fillets, or open joints.
For chip resistors and capacitors, confirm whether the part is 0402, 0603, 0805, or metric 1005/1608. Package naming can vary between imperial and metric systems. A mistaken package conversion may change the component size by more than 50%.
Automated equipment uses the centroid data and vision recognition, but clear silkscreen markings still help during programming, AOI review, inspection, and repair.
Mark the following clearly:
Keep polarity symbols outside solder pads and ensure that the silkscreen remains readable after solder mask registration. A symbol printed directly over a pad can be removed during fabrication or create confusion for the operator.
Fiducials provide fixed visual references for the placement machine and compensate for small variations in PCB fabrication. Use at least two global fiducials placed diagonally apart on the board. Three markers are preferred when the board shape and panel space allow it.
Recommended design practices include:
Fiducials should not be hidden under components or positioned where depanelization can damage them. Ask the assembly house for its camera field-of-view and minimum fiducial contrast requirements.
Component spacing must support the placement nozzle, soldering process, inspection camera, and future repair. The exact limit depends on the package and machine, but practical starting points include:
Components located too close together may be electrically valid but mechanically difficult to place or inspect. For example, a 0402 capacitor placed beside a connector pin may be hidden from the AOI camera or displaced when the connector is inserted.
Automated assembly lines usually transport boards using conveyor rails. A board that is too narrow, irregularly shaped, or missing a usable edge may require carriers or manual handling.
Discuss these points with the assembler:
A common production approach is to add 5–10 mm rails to the panel, but the correct dimension depends on the machine line. Avoid placing fragile components directly beside V-score lines. Mechanical stress during depanelization can crack ceramic capacitors or detach connectors.
The stencil controls the volume of solder paste deposited on each pad. Paste volume depends on aperture area, stencil thickness, paste rheology, and printing parameters. The area ratio is commonly expressed as:
Area ratio = aperture area / aperture wall area
For rectangular apertures, the area ratio is often simplified to:
Area ratio = (length × width) / [2 × (length + width) × stencil thickness]
An area ratio near or above 0.66 is widely used as a practical target for reliable paste release, although the correct value depends on the stencil, paste, and process. Fine-pitch parts may require laser-cut electropolished stencils, home-plate apertures, or reduced pad openings.
For QFN and exposed thermal pads:
A thermal pad with 100% paste coverage can trap volatile materials during reflow and create large voids. Segmented apertures often provide better control, but the final design should be validated with the paste supplier and assembler.
Uneven copper distribution can produce different heating rates across the PCB. Large copper pours connected to one side of a component may draw heat away from the joint, causing inconsistent soldering.
Review:
Tombstoning occurs when one end of a component melts or wets before the other. Balanced pad geometry, controlled paste volume, and balanced thermal connections reduce this risk.
The centroid file should include at least:
Check the coordinate origin. Some CAD tools export coordinates from the board origin, while others use a panel origin or a lower-left reference. Confirm whether rotation is measured clockwise or counterclockwise and whether the assembler expects 0–360 degrees or signed angles.
Open the centroid file in a spreadsheet and compare it with the assembly drawing. Pay special attention to polarized components, connectors, LEDs, ICs, and parts mounted on the bottom side.
A technically correct design can still stop production if a component is obsolete, unavailable, or supplied in the wrong package.
Before release:
Do not approve an alternate solely because the resistance, capacitance, or voltage rating is identical. Compare tolerance, temperature coefficient, dielectric, ESR, current rating, pin compatibility, and mechanical dimensions.
Every component on the board must be compatible with the selected soldering process. Check the manufacturer’s reflow profile, peak temperature, time above liquidus, and maximum number of reflow cycles.
Also determine whether the assembly is:
Switches, microphones, optical sensors, relays, batteries, and some connectors may require special handling. A no-clean process does not mean that every residue is acceptable for every application, particularly in high-impedance, high-voltage, or medical electronics.
In one production review, a hardware engineer named Maya had a four-layer controller board that passed schematic review and bench testing. The first 100 assembled boards produced 14 failures: six reversed LEDs, four open QFN joints, three misplaced connectors, and one shorted fine-pitch IC.
The investigation found four design-release issues:
The team corrected the footprint, divided the thermal-pad stencil opening into smaller sections, regenerated the centroid file, and added local optical references. On the next 100-board run, the placement-related defects fell to two, and both were detected by AOI before functional test. The improvement did not come from increasing machine speed; it came from removing ambiguity from the manufacturing data.
This case illustrates why automated assembly preparation is a data-control problem as much as a layout problem. A reliable PCB design for SMT assembly connects the schematic, footprint, stencil, pick-and-place file, inspection program, and BOM into one consistent manufacturing definition.
Problem: A diode, IC, connector, or LED is placed at the wrong angle.
Solution: Compare the centroid rotation with the pin-1 or polarity mark in the assembly drawing. Confirm the CAD exporter’s angle convention with the assembler. Include a visible orientation mark on the silkscreen.
Problem: The machine requires additional alignment time or rejects the board during vision recognition.
Solution: Add two or three global fiducials and local fiducials near fine-pitch devices. Keep the surrounding copper and silkscreen clear and follow the assembly line’s fiducial dimensions.
Problem: Components interfere with conveyor rails, routing tools, or depanelization.
Solution: Establish an edge keep-out zone before routing. Move tall, fragile, or overhanging components inward, or add panel rails and a carrier.
Problem: Bridges form between adjacent pins or pads.
Solution: Review the stencil thickness, aperture reduction, pad geometry, and paste area ratio. Use home-plate or modified apertures where recommended. Verify the result with SPI.
Problem: A QFN, DFN, power transistor, or exposed-pad IC has poor thermal or electrical contact.
Solution: Divide the thermal-pad stencil aperture, check PCB flatness, confirm paste volume, and use X-ray inspection when the joint is hidden.
Problem: One end of a chip resistor or capacitor rises during reflow.
Solution: Match pad dimensions, balance copper thermal connections, reduce paste-volume imbalance, and review placement relative to nearby heat sinks or copper pours.
Problem: The substitute part fits electrically but does not fit mechanically or thermally.
Solution: Approve alternates using a comparison table covering package, pitch, height, pinout, tolerance, MSL, operating temperature, and solderability.
Problem: Bottom-side components are missing from the assembly program or are treated as top-side parts.
Solution: Include the board side in both the centroid file and assembly drawing. Review bottom-side polarity and ensure that top-side components will not collide during the second reflow pass.
A one-stop PCB assembly partner can review manufacturing risks before fabrication if the complete data package is provided early. When contacting Benewave, send the BOM, Gerbers or ODB++ files, centroid data, board quantity, target lead time, component sourcing requirements, and inspection expectations.
Ask for clarification on:
For a new design, a small pilot build is usually more informative than immediately ordering a large batch. A pilot can reveal paste-coverage problems, connector interference, component availability issues, and programming errors before they affect thousands of boards.
The most dependable way to prepare a PCB design for automated assembly is to remove uncertainty before the board reaches the production line. Clear land patterns, consistent pick-and-place data, controlled solder paste volume, and verified fiducial markers reduce placement errors and rework. Whether you manage production internally or use Benewave for a one-stop PCB assembly service, a disciplined DFM review, reliable SPI data, and an accurate PCB design for SMT assembly create a repeatable manufacturing process.
Most assemblers require Gerber or ODB++ files, NC drill data, a BOM, centroid or pick-and-place data, and top- and bottom-side assembly drawings. They may also request a fabrication drawing, approved alternates, test requirements, and special process instructions.
Use at least two global fiducials positioned diagonally apart. Three global fiducials improve board orientation and distortion compensation when space permits. Fine-pitch components such as QFNs and BGAs may require local fiducials.
The exact requirement depends on the assembly machine and panel design. A practical starting point is to keep components several millimeters away from the board edge and confirm the assembler’s conveyor and tooling specification before final routing.
No. Very large connectors, odd-form parts, wire harnesses, heat sinks, batteries, some switches, and components with unusual packaging may require manual insertion, selective soldering, or a secondary operation. Identify these parts in the assembly instructions.
The centroid file tells the placement machine where each component is located, which side of the PCB it belongs to, and how it should be rotated. Incorrect coordinates or rotation values can produce systematic placement defects across the entire batch.
Usually not. A segmented stencil aperture often controls solder volume and reduces voiding or component floating. Follow the IC manufacturer’s land-pattern guidance and validate the design with the assembler, especially for QFN, DFN, and power packages.
SPI checks solder-paste volume and position, AOI checks visible component placement and solder joints, and X-ray inspection checks hidden joints such as BGAs and some thermal pads. Functional testing verifies whether the finished board performs its intended electrical operation.
Involve the manufacturer before layout is frozen. Early review allows changes to fiducials, panel rails, component spacing, stencil apertures, BOM alternates, and test access without causing a costly redesign.
Find Partners, Not Just Suppliers
Expert OEM & PCBA manufacturing tailored to your exact specifications. Contact us today to discuss your project and discover a more collaborative way to manufacture.
Get a Fast Quote & Free DFM Review
Related PCB Assembly Service