Phone: +86-137 5102 2384
Phone: +86-137 5102 2384
Sep. 17, 2026
Share:
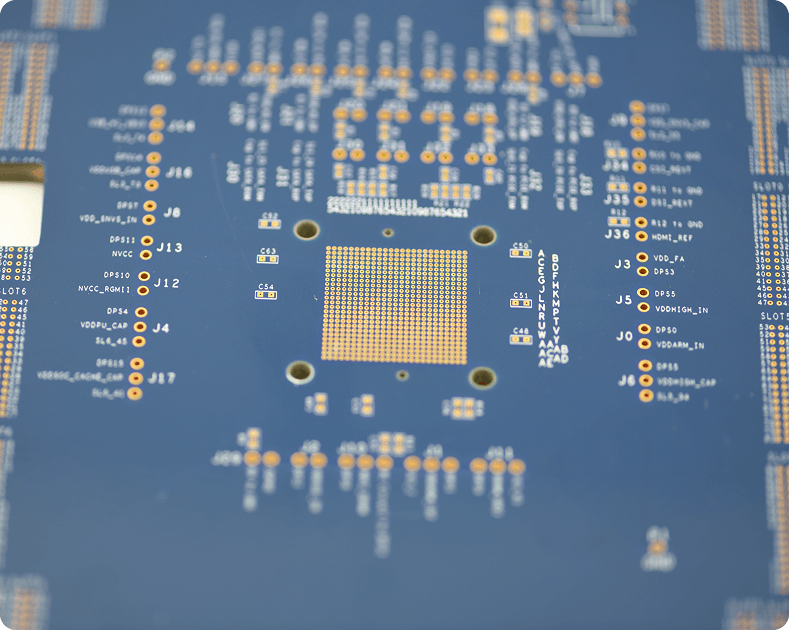
Fine-pitch components can reduce PCB size, but they also increase layout, inspection, stencil, reflow, and repair requirements. In practical fine pitch PCB assembly design, a 0.4 mm-pitch BGA may require tighter fine pitch component placement, more accurate SMT equipment, and additional solder paste inspection. The result is often a higher fine pitch SMT assembly cost, especially when pad-to-pad clearance falls below 0.15 mm or the board uses micro-BGA, QFN, or 0201 passives. This guide explains how to design for yield, estimate cost, prepare production files, and avoid defects when working with Benewave or another one stop pcb assembly supplier.

Fine-pitch packaging places more electrical connections into a smaller area. A component with a 0.5 mm lead pitch has approximately 20% less lead spacing than a 0.625 mm component, while a 0.4 mm BGA creates even tighter solder-mask, escape-routing, and inspection constraints.
The main user problem is usually not simply “the component is small.” The real problem is that a small change in pitch can affect the entire manufacturing chain:
For example, if a 1,000-board production run has a 98.5% first-pass yield, approximately 15 boards require rework. At 92%, approximately 80 boards require rework. The difference can exceed the original component cost because rework, inspection, troubleshooting, and schedule delays are charged in addition to assembly labor.
Component selection should occur before the PCB stackup, escape routing, and assembly quotation are finalized. A 0.4 mm-pitch BGA may need a different fabrication process from a 0.8 mm-pitch BGA, even when both components have the same number of pins.
| Package type | Typical manufacturing concern | Potential cost impact |
|---|---|---|
| 0.8 mm BGA | Standard fan-out is often possible with conventional vias | Usually moderate assembly complexity |
| 0.5 mm BGA | Tighter escape routing, reduced stencil apertures, more X-ray inspection | Higher tooling and inspection cost |
| 0.4 mm BGA or CSP | May require via-in-pad, filled vias, laser microvias, or HDI construction | Higher PCB fabrication and rework cost |
| 0.4 mm QFP | Risk of solder bridging and insufficient solder at fine leads | Higher stencil and process-control cost |
| 0201 passive | Placement, tombstoning, feeder, and solder-volume control | Higher setup sensitivity and inspection requirements |
When possible, use a larger-pitch alternative during the prototype stage. Replacing a 0.4 mm-pitch package with a 0.5 mm or 0.65 mm version may eliminate microvia requirements and reduce assembly risk without changing the circuit function.
A fine-pitch IC may cost only $0.20 more than a larger package, but the package can add several cost categories:
A useful estimating model is:
Total landed assembly cost = materials + PCB fabrication + stencil/tooling + placement + inspection + rework allowance + engineering and test costs.
For a small prototype lot, stencil and engineering charges can dominate. For a 10,000-board run, yield and cycle time usually have a larger financial effect. Therefore, a package that is economical for 20 prototypes may not be the lowest-cost choice for mass production.
Before requesting a quotation from Benewave or another one stop PCB assembly provider, prepare the following files and decisions.
Ask the assembly supplier these questions before releasing the design:
List every component with a lead or ball pitch below 0.65 mm. Mark BGA, CSP, QFN, LGA, 0201, and bottom-terminated packages as high-risk items.
For each item, record the pitch, body size, terminal geometry, recommended pad dimensions, coplanarity limits, moisture sensitivity level, and reflow temperature. The smallest pitch usually determines the stencil strategy and inspection method for the whole assembly.
Do not copy a footprint from an unverified online library. Compare the CAD footprint against the manufacturer’s recommended land pattern and IPC-7351 guidance.
Check pad length, pad width, solder-mask expansion, paste-mask reduction, courtyard size, and pin-1 marking. For a fine-pitch QFP, excessive pad length can increase solder volume and bridging. For a QFN, an oversized center thermal pad can produce floating, voiding, or package tilt.
For a BGA, determine how many signal rows can escape using the proposed trace width, spacing, and via diameter. A conventional through-hole via may consume too much area between 0.5 mm-pitch balls.
Possible solutions include:
Via-in-pad can improve routing density, but an unfilled via may wick solder away from the ball. A filled and capped via generally adds fabrication cost but reduces solder-volume variation.
Run DRC using the fabricator’s actual capabilities rather than generic default values. For fine-pitch work, verify:
If the solder-mask web cannot be maintained, the supplier may recommend solder-mask-defined pads, non-solder-mask-defined pads, or mask expansion. The correct option depends on the package and the required solder volume.
The stencil is one of the most important cost and yield controls in fine pitch PCB assembly. A common starting point is a 0.08 mm or 0.10 mm stainless-steel stencil, but the correct thickness depends on the smallest aperture and the largest component on the board.
For fine-pitch QFP leads, the aperture may be reduced by approximately 5% to 15% in area to reduce bridging. For QFN center pads, a windowpane pattern is often preferable to one large opening because it reduces trapped air and excessive solder height.
Use the aperture area ratio as a design check:
Area ratio = aperture opening area ÷ aperture wall area.
An area ratio near or above 0.66 is commonly used as a practical stencil-release target, although the final value depends on paste type, stencil coating, aperture geometry, and printer settings.
Control solder paste printing with a defined squeegee pressure, speed, separation distance, and stencil-cleaning interval. Verify paste volume with 3D solder paste inspection rather than relying only on visual inspection.
Typical process variables include:
Placement accuracy should be evaluated together with PCB fiducial quality, component tolerances, pad geometry, and machine speed. A machine’s advertised accuracy under laboratory conditions does not automatically equal production accuracy on a warped or poorly registered panel.
Use a thermocouple-equipped profiler to measure temperature at the most thermally sensitive and thermally isolated locations. Follow the solder paste supplier’s recommended ramp rate, soak range, time above liquidus, and peak temperature.
For lead-free SAC alloys, a peak temperature around 235°C to 250°C is common, but the exact value must follow the component and paste specifications. A profile that is too cold can cause insufficient wetting; a profile that is too hot can damage moisture-sensitive packages or increase intermetallic growth.
Pay special attention to:
Use 3D SPI to measure paste height, area, volume, and offset before reflow. Use AOI after reflow for visible leads and passives. Use X-ray inspection for hidden BGA and bottom-terminated joints when the package risk justifies it.
For prototypes, inspect the first article at a higher sampling rate than the production plan. Record defects by type, location, component, and probable cause. A defect log helps distinguish a footprint problem from a printing, placement, or reflow problem.
A hardware engineer at a small industrial-control company described a recurring problem with a 6-layer controller board using a 0.4 mm-pitch BGA. The first prototype batch contained 30 boards. Seven boards failed functional testing, and X-ray inspection identified several open or poorly formed BGA joints. The design team initially suspected the placement machine, but the assembly review found three contributing issues:
The team changed to a thinner stepped stencil, reduced the BGA paste apertures, specified filled and capped via-in-pad, and added a board-level fiducial near the BGA. In the next 50-board build, two boards required rework instead of seven out of 30. That corresponds to a reduction from 23.3% affected boards to 4.0%.
The change increased PCB fabrication and stencil cost, but it reduced troubleshooting time, replacement components, and schedule risk. The engineer’s main lesson was that a fine-pitch component cannot be evaluated separately from the stencil, via structure, and inspection plan.
This is a representative user case rather than a guarantee of the same result for every product. Actual results depend on package warpage, solder paste, board design, line capability, and operator training.
Symptom: Bridging, opens, insufficient solder, or an incorrectly positioned pin 1.
Solution: Rebuild or verify the footprint using the component manufacturer’s package drawing. Compare the CAD pad dimensions with the physical terminal dimensions and tolerance limits.
Symptom: Solder-mask bridges disappear, exposed copper merges, or the fabricator requests a design change.
Solution: Ask for the supplier’s minimum copper and solder-mask registration capability before finalizing the layout. If the required web cannot be manufactured, consider pad reshaping, solder-mask-defined pads, or a larger-pitch package.
Symptom: Fine-pitch leads bridge while large connectors receive insufficient solder.
Solution: Use step-down or step-up stencil technology, local aperture modifications, or a stencil thickness selected around the most sensitive package. Validate the decision with SPI data.
Symptom: BGA opens or QFN thermal-pad voiding appears after reflow.
Solution: Use filled and capped vias where appropriate, or move vias away from the solderable pad. Do not assume that every “via-in-pad” process means the via is sealed.
Symptom: The board passes optical inspection but fails functional testing.
Solution: Add X-ray inspection for hidden BGA, LGA, or bottom-terminated joints. Use boundary scan, in-circuit testing, or functional testing as additional verification methods.
Symptom: The nozzle cannot access the component, the stencil contacts a neighboring part, or rework becomes impossible.
Solution: Maintain component courtyard and keep-out zones. Separate tall electrolytic capacitors, shields, connectors, and heat sinks from fine-pitch packages when the assembly line or rework station requires access.
Symptom: Package cracking, delamination, or intermittent failure after reflow.
Solution: Check the moisture sensitivity level, floor life, storage humidity, and bake requirements. Follow J-STD-033 handling recommendations for moisture-sensitive devices.
A one stop PCB assembly partner is particularly useful when the project combines fine-pitch SMT, PCB fabrication, component sourcing, stencil production, X-ray inspection, and functional testing. Coordinating these suppliers separately can create responsibility gaps: the PCB fabricator may not know the assembler’s stencil limits, while the assembler may not know why a particular via structure was selected.
Benewave can be evaluated against practical criteria such as component sourcing capability, DFM review depth, minimum supported pitch, X-ray access, prototype-to-volume scalability, traceability, and rework control. Before placing an order, request a documented review of the BGA footprint, stencil aperture, PCB stackup, and inspection plan.
Fine-pitch components affect PCB assembly design and cost through routing density, PCB layer count, via technology, stencil geometry, placement accuracy, reflow control, inspection, and rework. The most economical design is not always the one with the smallest component. It is the design that achieves the required electrical performance while maintaining a predictable production yield.
For a reliable project, identify the smallest pitch first, verify the manufacturer footprint, confirm fabricator tolerances, plan the stencil around the most sensitive package, and define X-ray or other inspection before production. Use a pilot build to measure actual paste volume, placement offset, solder-joint quality, and first-pass yield. In the final review, confirm that your fine pitch PCB assembly design, fine pitch component placement, and fine pitch SMT assembly cost are supported by the selected SMT process, BGA inspection method, and IPC-7095-aligned manufacturing plan.
There is no single universal cutoff, but components with lead pitches below approximately 0.65 mm are commonly treated as fine-pitch in PCB assembly. Packages at 0.5 mm, 0.4 mm, and below require more careful control of pad geometry, solder volume, registration, and inspection.
No. The impact depends on volume, package type, PCB layer count, via technology, stencil design, inspection requirements, and expected yield. A 0.5 mm QFP may add little cost, while a 0.4 mm BGA requiring filled microvias and X-ray inspection can significantly increase total cost.
No. Visible-lead QFPs can often be inspected with AOI and electrical testing. Hidden joints under BGA, CSP, LGA, and some QFN packages cannot be fully verified optically, so X-ray inspection is often recommended according to product risk and quality requirements.
A 0.08 mm to 0.10 mm stencil is a common starting range, but there is no universal answer. The final selection depends on the smallest aperture, solder-paste powder size, component mix, and whether a step stencil is needed for larger parts.
It depends on the BGA supplier recommendation, pad size, solder-mask registration, and reliability requirements. Many designs use non-solder-mask-defined pads for BGA soldering, but the correct choice must be checked against the package datasheet and PCB fabricator capability.
Provide complete fabrication and assembly data, use verified footprints, add local fiducials, select the stencil after reviewing the smallest package, request SPI and X-ray inspection where appropriate, and ask the assembler to conduct a DFM review before tooling.
Yes, but repair requires suitable hot-air or localized reflow equipment, alignment capability, controlled thermal exposure, and post-repair inspection. BGA rework is more complex than replacing a standard resistor and can damage the PCB if repeated heating exceeds the board’s thermal limits.
Ask about minimum pitch, placement accuracy, stencil options, SPI and X-ray capability, BGA rework, PCB via-in-pad processes, component traceability, prototype yield expectations, and the DFM approval process. These answers help you compare suppliers using manufacturing capability rather than assembly price alone.
Find Partners, Not Just Suppliers
Expert OEM & PCBA manufacturing tailored to your exact specifications. Contact us today to discuss your project and discover a more collaborative way to manufacture.
Get a Fast Quote & Free DFM Review
Related PCB Assembly Service