Phone: +86-137 5102 2384
Phone: +86-137 5102 2384
Sep. 24, 2026
Share:
BGA assembly defects can cause hidden open joints, short circuits, weak solder connections, and early product failure. BGA soldering needs accurate paste printing, stable placement, and controlled heating. A reliable reflow profile helps each solder ball melt and join the PCB pad correctly. X-ray inspection is often required because most BGA joints are hidden under the package. This guide explains the main causes, inspection methods, repair options, and prevention controls used by professional PCB assembly suppliers such as Benewave.

The most common BGA defects come from five process areas: solder paste printing, component placement, PCB or package condition, reflow heating, and inspection control. The highest risk usually appears when solder volume is not uniform, moisture is trapped in a package, or the temperature profile does not match the solder paste and component data sheet.
| Defect | Typical root cause | Best detection method | Main prevention action |
|---|---|---|---|
| Head-in-pillow | Oxidation, warpage, low solder volume, or poor coalescence | 3D X-ray, cross-section, electrical test | Control moisture, paste, placement, and reflow peak |
| Non-wet open | Oxidized pad, low heat transfer, or contaminated surface | X-ray, continuity test, cross-section | Clean surfaces and verify the thermal profile |
| Solder bridge | Excess paste, stencil design error, or pad spacing issue | X-ray, electrical test, microscope | Reduce paste volume and improve stencil apertures |
| Void | Flux gases trapped during melting | 2D or 3D X-ray | Optimize paste, stencil, and heating ramp |
| Missing or damaged ball | Handling damage, poor package storage, or placement impact | Package inspection, X-ray, visual inspection | Use controlled handling and incoming inspection |
| Open solder joint | Insufficient paste, coplanarity error, or board warpage | X-ray, ICT, functional test | Control flatness, paste deposition, and placement force |
A visual inspection alone cannot confirm the quality of hidden BGA joints. For prototypes and low-volume orders, a qualified supplier should combine optical inspection with X-ray inspection and electrical testing. For production, the inspection plan should define sampling, defect limits, X-ray settings, rework rules, and traceability before the first lot is built.
A ball grid array, or BGA, is a surface mount component that uses a grid of solder balls on the bottom of the package. These balls connect the component to matching copper pads on the printed circuit board. BGAs support many connections in a small area, so they are common in processors, memory devices, communication modules, automotive controllers, and industrial electronics.
The main benefit of a BGA is high connection density. The main manufacturing challenge is that the solder joints are hidden below the package. Operators cannot inspect each joint with a normal microscope after reflow. A small defect in the center of the array may remain hidden until the product fails an electrical or functional test.
Defect found
Step 1: Confirm the defect with the correct inspection method
Then identify whether the issue is an open, short, void, displacement, or solder shape problem
Step 2: Separate process causes from material causes
Check paste, stencil, PCB pads, package balls, placement data, and reflow profile
Step 3: Compare results with the approved process window
Review SPI data, placement logs, oven records, X-ray images, and electrical test results
Step 4: Apply a controlled corrective action
Change one major variable at a time and build a confirmation sample
Step 5: Verify the action
Repeat inspection and testing, then update the process control plan
This flow prevents a common mistake: changing the reflow temperature when the actual cause is poor paste printing. A useful root cause investigation compares defect location, defect frequency, component lot, board panel position, and production time. If defects appear only in the center of a large panel, thermal balance may be involved. If defects follow one BGA part number, package condition or component handling may be involved.
Head-in-pillow occurs when the solder ball on the BGA and the solder paste deposit on the PCB appear to touch but do not form one continuous solder joint. The ball and paste can separate during heating because of package warpage, board movement, oxidation, or low solder volume. The result may look acceptable in a standard X-ray image, so 3D analysis or cross-section work may be needed.
Moisture can increase package expansion during reflow. A poor thermal profile can also prevent the paste from fully joining the ball. Recommended controls include dry storage, moisture sensitivity level management, accurate placement, suitable paste volume, and a reflow profile that allows enough time above liquidus.
A non-wet open is a solder joint where the molten solder does not properly bond to the pad or the component ball. The joint may have a small contact area or no electrical connection. Common causes include oxidation, contamination, low temperature, short time above liquidus, and poor flux activity.
The risk increases when PCB surface finish is damaged or stored in high humidity for too long. Incoming inspection should check pad condition, surface finish, package ball condition, and solder paste age. X-ray and continuity testing can help confirm the defect.
A solder bridge connects two or more neighboring pads. It can create a direct short and may damage a processor or power circuit at startup. Bridges often result from excessive paste, incorrect stencil aperture design, component shift, pad spacing problems, or solder mask limitations.
The risk is higher for fine-pitch BGAs. Stencil thickness, aperture reduction, paste release, and print alignment must be reviewed together. A useful control is to measure paste height, area, and volume for every BGA pad pattern during the first article stage and after major process changes.
An open solder joint has no reliable electrical path between the BGA ball and the PCB pad. It may result from low paste deposition, a missing ball, excessive component movement, PCB warpage, package warpage, or poor contact during reflow. Some opens are intermittent and appear only after temperature cycling or vibration.
Electrical tests are important because an X-ray image may not always show the complete mechanical condition of a joint. Functional testing and boundary scan testing can find connection failures that are difficult to classify by image alone.
A void is a gas-filled space inside the solder joint. Small voids may have little effect, but large or concentrated voids can reduce mechanical strength and thermal transfer. Voids below thermal pads are especially important in power devices because they can increase thermal resistance.
Void formation depends on paste chemistry, flux evaporation, powder type, stencil design, pad pattern, and oven heating. There is no single void percentage that is correct for every design. The acceptance limit should be based on the customer specification, component data, reliability needs, and applicable IPC requirements.
Solder balling produces small unwanted solder spheres around the component or elsewhere on the board. It may be caused by paste spatter, poor powder separation, excessive heating rate, expired paste, moisture, or an unsuitable reflow profile. Loose solder balls can later move and create intermittent shorts.
Prevention includes correct paste storage, controlled thawing, first-in first-out material use, clean printing equipment, and a profile that follows the paste supplier instructions. Boards should be handled carefully after reflow and checked for loose particles when the product has a high reliability requirement.
BGA misalignment occurs when the package is not centered over the pad array. Small movement can be corrected by surface tension during reflow, but excessive shift can create opens, bridges, or uneven joints. Causes include incorrect placement coordinates, fiducial errors, poor vision calibration, PCB expansion, and excessive placement force.
A good placement process checks board fiducials, component recognition data, nozzle condition, and machine calibration. The first board should be reviewed before full production. If the BGA is repeatedly shifted in one direction, inspect the CAD data, panel tooling, and thermal expansion assumptions.
Warpage changes the distance between the BGA package and the PCB during heating. Some balls may contact and melt correctly while other balls remain separated. This condition is difficult to see from the outside and can create a pattern of opens or head-in-pillow defects.
Measure large or fine-pitch packages when risk is high. Use suitable support tooling for thin boards and large panels. Reflow should be balanced across the board, and the assembly supplier should confirm that the package, PCB, and fixture can tolerate the heating cycle.
Insufficient solder means that the printed deposit or final joint volume is below the process target. It can result from blocked stencil apertures, poor paste release, low squeegee pressure, incorrect stencil thickness, paste drying, or pad design limitations.
Solder paste inspection provides a direct measurement of this risk. The control plan should define acceptable paste height, area, volume, and offset. A supplier should not rely only on operator judgment because a small volume difference across hundreds of BGA pads can be hard to see.
Excess solder can increase the risk of bridging, solder balls, package float, and uneven joint height. It may come from an oversized aperture, stencil damage, double printing, paste buildup, or incorrect CAD data.
Stencil aperture design should be reviewed against pad size, pitch, package type, and solder paste characteristics. Cleaning frequency should be defined by actual print results. If the process uses a step stencil or local thickness change, the transition must be checked for consistent paste release.
Pad cratering is damage in the PCB laminate below or near a copper pad. It can occur during component placement, depanelization, board bending, rework, or mechanical testing. The solder joint may look normal while the connection below the pad is damaged.
Reduce this risk with proper board support, controlled depanelization, lower mechanical stress, and suitable rework temperatures. Large BGAs should not be used as a gripping point during manual handling. Reliability testing may include thermal cycling, vibration, or mechanical stress based on the end product.
Thermal damage can include lifted pads, delamination, solder mask discoloration, damaged laminate, and component overheating. It often results from an excessive peak temperature, too much time above liquidus, repeated reflow cycles, or uncontrolled BGA rework.
The assembly profile must match the solder paste, PCB materials, and component limits. Record the number of reflow and rework cycles for sensitive assemblies. A professional supplier should use thermocouples on representative locations instead of assuming that the oven display temperature equals the board temperature.
No single inspection method finds every BGA defect. Optical inspection is fast and useful for visible conditions, but it cannot see most solder joints below the package. X-ray inspection reveals hidden solder structures, while electrical testing confirms whether the circuit works. A strong inspection plan combines methods according to product risk and production volume.
| Inspection method | What it can find | Important limitation | Best use |
|---|---|---|---|
| Visual inspection | Package damage, missing parts, contamination, board damage | Cannot see hidden BGA joints | Incoming and final checks |
| AOI | Placement, polarity, visible solder, missing components | Limited view under a BGA | Fast line monitoring around the BGA |
| SPI | Paste height, area, volume, and offset | Measures paste before reflow, not the final joint | Preventing print-related defects |
| 2D X-ray | Opens, bridges, voids, missing balls, shift patterns | Overlapping features can be difficult to interpret | Routine BGA solder inspection |
| 3D X-ray | Joint height, volume, void distribution, package position | Higher cost and more setup time | Fine pitch and complex failure analysis |
| Electrical test | Opens, shorts, wrong connections, functional failures | May not show the physical root cause | ICT, flying probe, boundary scan, and final test |
| Cross-section | Actual internal solder structure and interfaces | Destructive test | Process validation and root cause analysis |
Start by checking the complete array pattern. Look for missing balls, irregular ball size, shift, bridges, and unusual contrast. Then compare the center area with the edge area. A repeating defect on one side may indicate board or package warpage. A random defect pattern may point to paste transfer, contamination, or material variation.
For void analysis, record void location, count, size, and percentage of the joint area. Do not judge a void only by its appearance. A void under a thermal pad may have a different impact from a small void in a signal connection. Use the customer specification and reliability requirement as the final decision basis.
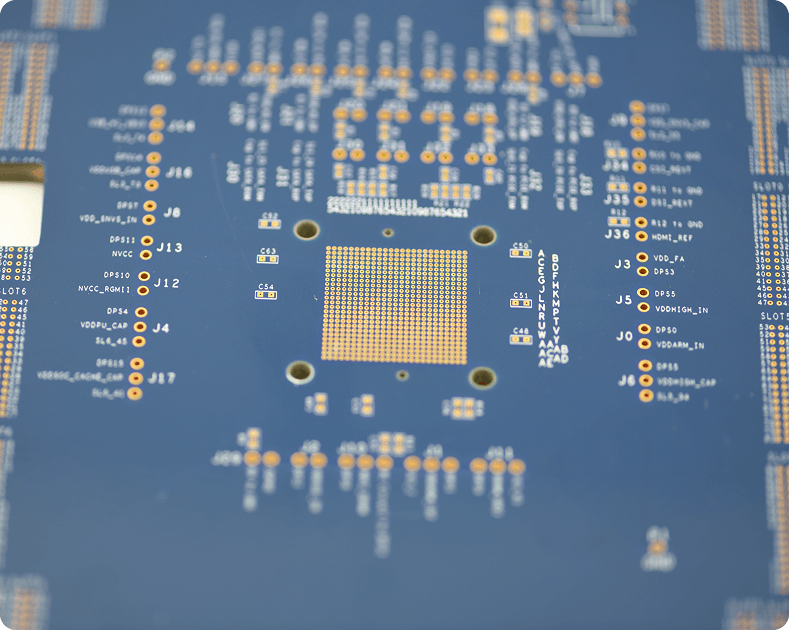
Design for manufacturability begins before the first board is assembled. The PCB land pattern should follow the component manufacturer's recommendation. Pad size, solder mask registration, via position, copper balance, thermal pad design, and board thickness all influence solder joint quality.
Avoid placing vias where they can draw solder away from the BGA pad unless the design uses an approved filled and capped via process. Check the minimum component spacing needed for printing, inspection, rework, and cleaning. A design review can prevent a production problem that would be expensive to solve after tooling is complete.
Printing is one of the most important BGA process steps. The stencil must be flat, clean, and matched to the PCB. Squeegee pressure, speed, separation, paste temperature, and board support should be controlled. Paste should not remain open beyond the supplier's stated working time.
Use SPI to track paste volume rather than checking only a few pads by eye. If volume trends move toward a limit, clean the stencil or correct the process before defects appear. A stable process is easier to maintain when the team uses control charts and records changes by lot.
BGA packages can absorb moisture from the air. During reflow, that moisture may expand and cause package cracking, delamination, warpage, or head-in-pillow defects. Follow the component moisture sensitivity level instructions for floor life, dry packing, baking, and exposure time.
Solder paste also needs controlled storage and handling. Record the time of removal from cold storage, allow safe thawing, and never mix old and new paste without approval. Use lot tracking so a defect can be connected to a material source quickly.
A reflow profile has several important zones: preheat, soak, liquidus, peak, and cooling. The exact limits depend on the solder alloy, paste, PCB, component, and supplier instructions. A common lead-free profile may use a peak near 235 to 250 degrees Celsius, but the approved data sheet must control the process.
Use thermocouples to measure the actual board temperature at the BGA center, edge, and nearby thermal areas. Check ramp rate, soak time, time above liquidus, peak temperature, and cooling rate. Reprofile the oven after major product, material, or conveyor changes.
The placement machine should recognize the BGA package and PCB fiducials correctly. Nozzles must be clean and suitable for the package. Excessive placement force can damage solder balls or pads, while insufficient contact can increase the risk of poor alignment.
Measure placement accuracy during first article production. Review the result by board position, not only by average value. A process can show an acceptable average while one panel corner has a consistent offset.
Thin PCBs and large panels can bend during printing, placement, and reflow. The stencil may not contact the board evenly, and BGA joints may experience different pressure across the panel. Use pins, tooling, vacuum support, or a custom fixture when the board design needs additional stability.
Fixtures should support the board without touching sensitive components or creating local stress. Inspect fixture wear because a damaged support tool can create a defect pattern that appears to be a printing or reflow problem.
The quality plan should define what counts as an acceptable BGA joint, a process indicator, and a reject condition. It should include X-ray image examples, void rules, bridge rules, open joint rules, and rework limits. Reference standards may include IPC-A-610, J-STD-001, and IPC-7095, but the customer specification remains important.
Do not use one universal limit for every BGA design. Fine-pitch signal devices, high-current power devices, automotive products, and consumer products can have different risk levels. The acceptance rule should consider electrical function, mechanical stress, thermal performance, and expected service life.
BGA rework should be performed only with approved equipment, trained operators, and a documented profile. Manual heating with an uncontrolled hot air tool can damage the PCB, nearby parts, laminate, and internal layers. It can also create a joint that looks repaired but has poor reliability.
Confirm failure
Use X-ray and electrical test to verify that rework is necessary
Remove the BGA with controlled top and bottom heating
Inspect the PCB pads for lifted pads, residue, oxidation, and laminate damage
Clean and prepare the site without removing excess copper
Apply a new BGA or reballed component according to the work instruction
Place the component with calibrated alignment equipment
Run the approved local or full-board reflow profile
Inspect with X-ray and repeat electrical testing
Record the rework count, operator, profile, defect, and final result
Replace a BGA when the package has damaged balls, visible cracks, excessive oxidation, moisture damage, or repeated failed rework. A component should not be reused only because it appears visually clean. Reballing may be suitable in some cases, but it needs compatible materials, accurate ball placement, and controlled heating.
Set a maximum rework count for the PCB and component. Multiple thermal cycles can weaken pads, laminate, solder mask, and nearby components. The limit should be based on the board construction and reliability requirements rather than convenience.
| Observed symptom | Likely cause | Data to review | Corrective action |
|---|---|---|---|
| Opens concentrated at the package edge | Package or board warpage | X-ray location map and profile data | Improve support and thermal balance |
| Opens across random pads | Paste transfer, contamination, or missing balls | SPI, incoming inspection, and material lot | Correct printing and tighten material checks |
| Bridges on one BGA design | Stencil aperture or pad design issue | Paste volume by pad and CAD data | Modify aperture reduction or stencil thickness |
| Voids at thermal pad locations | Flux gas release and large paste area | 3D X-ray void map | Use segmented apertures and adjust profile |
| Defects after long storage | Moisture absorption or oxidation | MSL record and storage humidity | Improve dry storage and bake control |
| Defects after rework only | Excessive thermal or mechanical stress | Rework profile and operator record | Use a qualified rework profile and fixture |
Overseas buyers and distributors need measurable information, not only a statement that the boards were inspected. Ask the PCB assembly supplier how the process is controlled and how defects are reported. The following metrics provide a clearer view of manufacturing risk.
Targets must be agreed with the customer, but a practical control plan can set measurable internal goals. For example, 100 percent SPI coverage can be used for high-risk BGA paste patterns, 100 percent X-ray inspection can be used for prototypes or critical assemblies, and all reworked BGAs can receive a second X-ray and electrical test. These are process choices, not universal legal requirements.
For a stable production line, track defects per million opportunities, first pass yield, rework rate, and top three defect causes. Review the trend weekly during launch and monthly after the process is stable. A rising trend often gives an early warning before a customer complaint occurs.
A capable supplier should be able to explain how it handles fine-pitch BGA parts, moisture-sensitive packages, X-ray inspection, rework, and production traceability. Ask whether the supplier has SPI, AOI, X-ray, electrical testing, profile measurement, and trained rework technicians. Also ask how the supplier handles customer-approved deviations.
| Question | Why it matters |
|---|---|
| Can you provide a BGA process flow? | Shows whether the supplier controls each manufacturing step. |
| Do you use SPI before reflow? | Confirms that solder paste volume is measured before hidden defects form. |
| What X-ray capability is available? | Shows how hidden solder joints will be verified. |
| How are moisture-sensitive components stored? | Reduces package cracking and head-in-pillow risk. |
| How is the reflow profile approved? | Confirms that actual board temperatures are measured. |
| What are the rework limits? | Helps protect PCB pads and long-term reliability. |
| Can you provide lot traceability? | Makes root cause analysis faster and more accurate. |
| Which standards guide inspection? | Shows whether acceptance criteria are defined and documented. |
Benewave can support overseas customers with one stop pcb assembly planning, component sourcing, SMT production, BGA inspection, testing, and shipment coordination. The correct service level depends on board complexity, component pitch, annual volume, product risk, and customer documentation needs.
AOI can detect visible placement and solder conditions around a BGA, but it cannot fully inspect the hidden solder joints under the package. Use X-ray inspection for hidden opens, bridges, voids, missing balls, and shift patterns. Electrical testing can add confirmation that the connections work.
The need depends on product risk, customer requirements, BGA pitch, package type, and production stage. It is strongly useful for prototypes, new designs, fine-pitch devices, safety-related products, and failure analysis. Many suppliers use sampling for stable mass production, while critical products may require 100 percent inspection.
There is no single value for every BGA joint and product. The acceptable limit depends on the joint function, void location, component design, reliability requirement, and customer specification. Power and thermal joints usually need more careful evaluation than low-current signal joints.
The most serious defect depends on the circuit. A short can cause immediate damage, while an open or head-in-pillow joint can create an intermittent failure that is difficult to reproduce. A large void under a thermal connection can cause overheating. The correct priority comes from electrical, thermal, and reliability analysis.
Many BGA defects can be repaired with qualified rework equipment and a controlled process. The PCB must first be checked for pad damage, delamination, and excessive thermal exposure. After rework, the board should receive X-ray inspection and electrical testing. Repeated rework may reduce long-term reliability.
Control package moisture, use fresh and properly stored solder paste, improve solder paste volume, reduce placement and board movement, and validate the reflow profile. Check for package warpage and board flatness when the defect is concentrated at the package edge or center.
The center may experience a different thermal response from the edge, especially on a large panel or with heavy copper. Board support, thermal mass, paste volume, and component density can also vary by location. Compare X-ray results with thermocouple data and panel position maps.
BGA assembly defects are usually preventable when the process is designed and measured before mass production. The key controls are correct land patterns, stable solder paste printing, moisture management, accurate placement, a verified reflow profile, X-ray inspection, electrical testing, and documented rework.
For the fastest root cause analysis, connect each defect to a location, component lot, machine, time, and process record. Do not depend on visual inspection alone. A complete BGA quality plan gives overseas buyers clear evidence that the PCB assembly is controlled from material receipt to final shipment.
When selecting a one stop PCB assembly partner, compare equipment, inspection coverage, engineering support, standards, traceability, and communication. Benewave helps customers turn BGA design and production risks into documented process controls, measurable inspection results, and dependable assembled PCBs.
Find Partners, Not Just Suppliers
Expert OEM & PCBA manufacturing tailored to your exact specifications. Contact us today to discuss your project and discover a more collaborative way to manufacture.
Get a Fast Quote & Free DFM Review
Related PCB Assembly Service